Introduction
Chocolate desserts hold a special place in the hearts of many. Whether it’s the silky smoothness of a chocolate mousse or the decadent layers of a chocolate cake, the allure of chocolate is undeniable. Among these delightful creations, mini chocolate cream pies stand out as a beloved choice. These bite-sized treats pack a punch of flavor and indulgence, making them perfect for any occasion. From casual family gatherings to elegant dinner parties, mini chocolate cream pies are sure to please chocolate lovers of all ages.
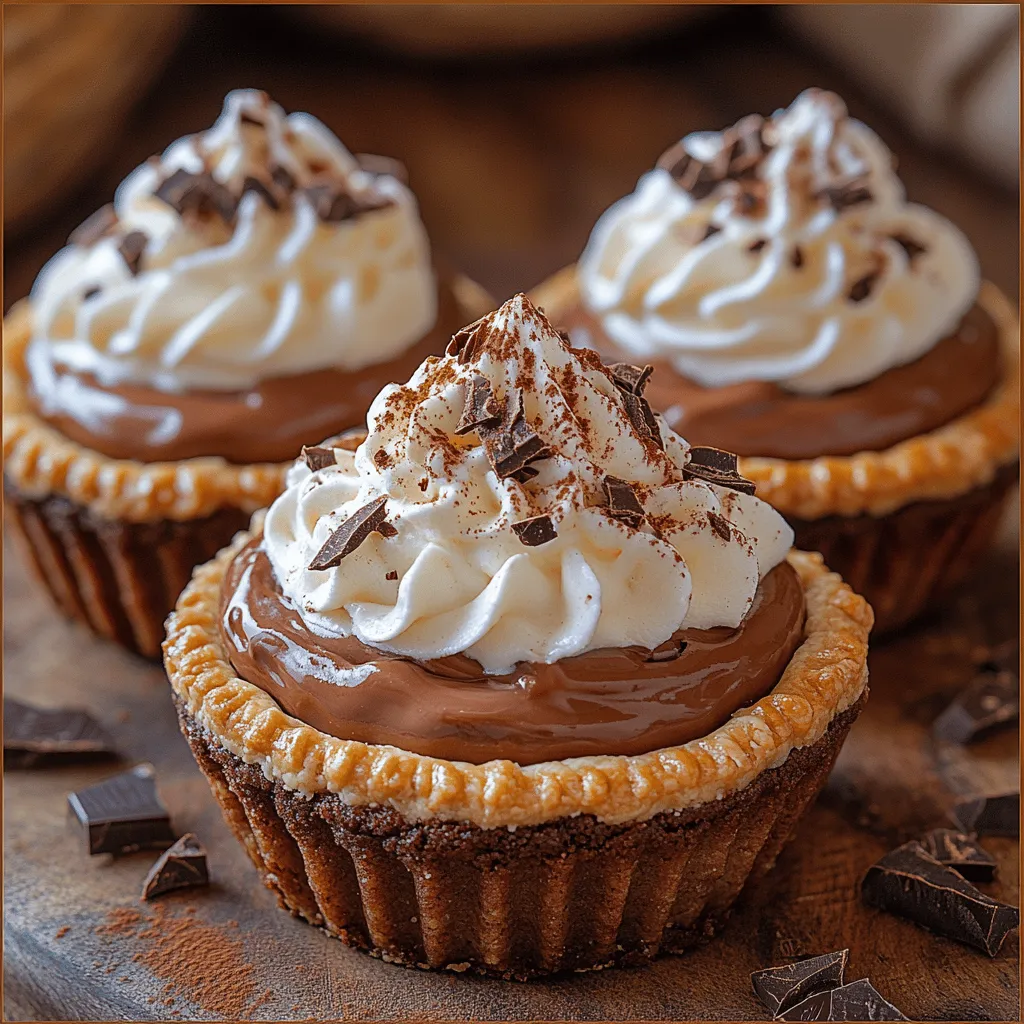
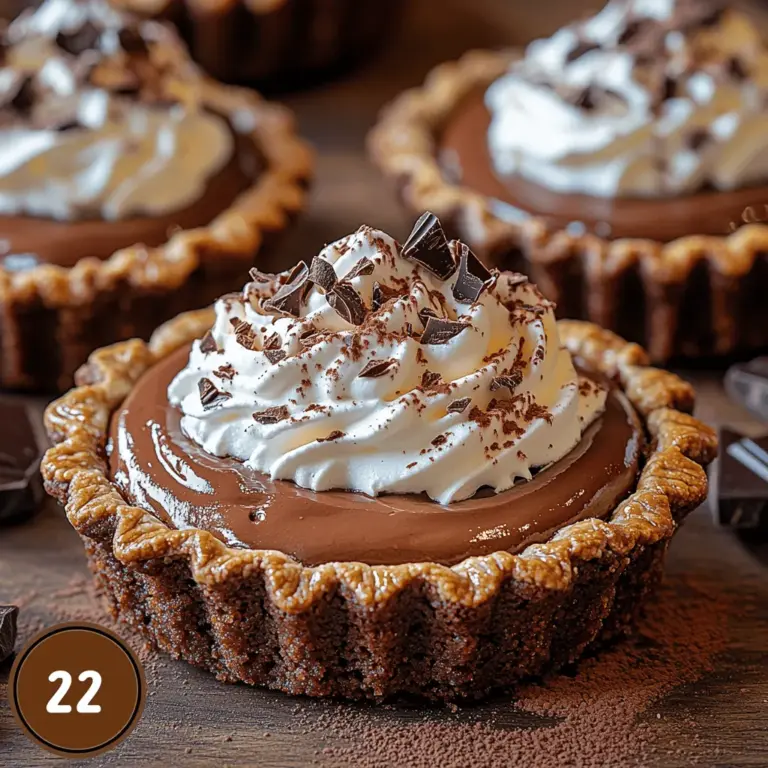
What makes these mini pies so appealing is not just their taste but also their presentation. Their petite size allows for easy serving, and their rich, creamy filling is a decadent surprise that leaves everyone wanting more. With a buttery, crumbly crust and a luscious chocolate filling topped with whipped cream, these mini chocolate cream pies are the ultimate indulgence that can elevate any dessert table.
The Allure of Chocolate Cream Pies
Chocolate cream pies have a storied history in dessert culture, tracing their roots back to the early 19th century when cream pies first became popular in the United States. Traditionally, cream pies were made with a silky custard filling, and chocolate quickly became a favored flavor. Over the decades, chocolate cream pies evolved, with various adaptations and interpretations emerging, solidifying their status as a classic American dessert.
The universal love for chocolate can be attributed to its rich flavor profile and its ability to evoke feelings of comfort and happiness. Chocolate contains compounds that stimulate the release of endorphins in the brain, enhancing mood and providing a sense of pleasure. This biochemical reaction, combined with the rich, creamy texture of chocolate cream filling, explains why chocolate desserts are often the stars of celebrations and gatherings.
In recent years, the trend of mini desserts has gained traction, offering several benefits over traditional-sized treats. Mini desserts allow for portion control, making it easier for guests to sample a variety of flavors without the guilt of indulging in a large slice. They also add a touch of sophistication to any event, showcasing the chef’s creativity and attention to detail. Mini chocolate cream pies are the perfect embodiment of this trend, providing a delightful combination of taste and aesthetic appeal in a dainty, manageable size.
Ingredients Breakdown
Creating the perfect mini chocolate cream pies requires a careful selection of ingredients, each playing a vital role in achieving the desired flavor and texture. Below is a breakdown of the key ingredients that come together to create these delectable treats.
Chocolate Cookie Crumbs
The foundation of any great pie is its crust, and for mini chocolate cream pies, chocolate cookie crumbs are the ideal choice. Made from crushed chocolate cookies, this crust provides a rich, chocolatey base that complements the creamy filling. The crumbly texture of the cookies contributes to the overall experience, adding a satisfying crunch that pairs well with the smoothness of the filling.
Unsalted Butter
Unsalted butter is a key player in the recipe, enhancing the richness and flavor of the crust. It acts as a binding agent, helping the cookie crumbs stick together to form a cohesive crust. Using unsalted butter allows for better control of the overall saltiness of the dessert, ensuring that the sweet flavors of the chocolate are highlighted.
Heavy Cream
Heavy cream is essential for creating the luscious chocolate filling and the whipped topping that crowns the mini pies. Its high-fat content contributes to the creamy texture that makes each bite feel indulgent. When whipped, heavy cream transforms into a light and airy topping that adds a beautiful finish to the pies while also balancing the richness of the chocolate filling.
Semi-Sweet Chocolate Chips
As the star of the filling, semi-sweet chocolate chips bring depth and richness to these mini chocolate cream pies. They melt beautifully, creating a smooth mixture that forms the base of the filling. The balance of sweetness in semi-sweet chocolate pairs perfectly with the other ingredients, ensuring that the pies are satisfyingly sweet without being overwhelming.
Egg Yolks
Egg yolks are crucial for providing richness and creaminess to the filling. They help to thicken the mixture, creating a velvety texture that coats the palate beautifully. The addition of egg yolks also enhances the overall flavor profile, adding a subtle richness that complements the chocolate.
Granulated and Powdered Sugar
Both granulated and powdered sugar play important roles in balancing the sweetness of the chocolate cream filling. Granulated sugar is typically used for the initial mixture, while powdered sugar is often added to the whipped cream topping for a light, sweet finish. This combination ensures that the dessert is sweetened to perfection, allowing the chocolate flavor to shine through.
Cornstarch
Cornstarch serves as a thickening agent for the chocolate filling, helping to achieve the desired consistency. When heated, cornstarch forms a gel-like texture that stabilizes the filling, ensuring that it holds its shape once poured into the crust. This is essential for mini pies, as they need to maintain their form while being served and enjoyed.
Importance of Using Quality Ingredients
When it comes to desserts, the quality of the ingredients can make a significant difference in the final result. Using high-quality chocolate, fresh eggs, and pure vanilla extract can elevate the flavor profile of your mini chocolate cream pies. Investing in good ingredients not only enhances the taste but also contributes to a more enjoyable eating experience, making your desserts the star of any occasion.
Step-by-Step Guide to Making Mini Chocolate Cream Pies
Now that we’ve explored the allure of chocolate cream pies and the importance of quality ingredients, it’s time to dive into the step-by-step guide for making these delicious mini treats.
Preparing the Crust
1. Gather Your Ingredients: Start by assembling all the necessary ingredients for the crust, which include chocolate cookie crumbs, unsalted butter, and a pinch of salt.
2. Preheat the Oven: Preheat your oven to 350°F (175°C) to prepare for baking the crust.
3. Mix the Cookie Crumbs and Butter: In a mixing bowl, combine the chocolate cookie crumbs and melted unsalted butter. Use a fork or your hands to mix until the crumbs are fully coated and resemble wet sand.
4. Press the Mixture into Muffin Tins: Take a mini muffin tin and press the crumb mixture firmly into the bottom and up the sides of each cup. Make sure the crust is evenly distributed for consistent baking.
5. Bake the Crust: Place the muffin tin in the preheated oven and bake for approximately 8-10 minutes, or until the crust is set and slightly firm to the touch. Remove from the oven and let them cool completely before adding the filling.
This preparation of the crust is a critical step in ensuring that your mini chocolate cream pies have a solid foundation that can hold up to the rich filling.
With the crust ready, we will move on to the delightful chocolate filling in the next part of the recipe. Stay tuned for further instructions on creating the rich, creamy chocolate filling that will make these mini pies truly irresistible.

Importance of Chilling for the Perfect Crust
Achieving that perfect flaky crust in your Mini Chocolate Cream Pies starts with a crucial step: chilling. After you prepare the pie dough, it’s essential to wrap it in plastic wrap and refrigerate it for at least 30 minutes. This resting period allows the fats in the dough to solidify, which helps create a tender and flaky texture when baked. Cold dough is easier to roll out and less likely to shrink during baking. Moreover, a chilled crust helps to prevent the formation of gluten, which can make the pie crust tough. Don’t skimp on the chilling time; it’s vital for the overall quality of your mini pies.
Crafting the Chocolate Filling
Once your crusts are baked and cooled, it’s time to craft the rich, decadent chocolate filling that will make your mini pies irresistible. Start with high-quality dark chocolate, as it will provide a deep, rich flavor that complements the sweetness of the whipped cream topping. You can use either chocolate chips or a chocolate bar, chopped into small pieces to ensure even melting.
Begin by heating milk and heavy cream in a saucepan over medium heat. Stir frequently until the mixture is hot but not boiling; this step is crucial as boiling can scald the cream and affect the final texture. Once heated, remove the saucepan from the heat and add the chopped chocolate. Allow it to sit for a minute to soften before whisking it until smooth.
Techniques for Ensuring a Smooth Filling
To achieve a velvety and smooth chocolate filling, proper technique is crucial. Whisking is not just about blending ingredients; it’s about incorporating air and ensuring even distribution of heat. If you’re using egg yolks in your filling (a common practice for cream pies), temper them to prevent scrambling.
To temper the yolks, take a small amount of the hot chocolate mixture and slowly whisk it into the yolks. This gradual temperature increase allows the yolks to incorporate without cooking. Once tempered, whisk the yolk mixture back into the chocolate mixture and stir until well combined. This process ensures a creamy texture without any lumps.
Explanation of the Cooking Process and Achieving the Right Consistency
Next, return the saucepan to low heat, stirring constantly. The heat will help the filling thicken. Watch for the mixture to coat the back of a spoon, which indicates that it’s reached the right consistency. This step might take about 5-10 minutes. Once thickened, remove from the heat and incorporate a pinch of salt and vanilla extract for added depth of flavor.
It’s essential not to rush this process; taking the time to cook the filling gently will result in a luxurious texture that elevates your mini pies. Pour the filling into a bowl and cover it with plastic wrap, pressing it directly against the surface to prevent a skin from forming as it cools.
Filling the Crusts
Once your filling has cooled slightly, it’s time to fill the crusts. Use a ladle or a measuring cup to pour the filling into each cooled pie crust. Fill them just to the top, but be careful not to overflow. This is where a steady hand comes in handy.
Tips for Pouring the Filling Without Mess
To minimize mess, consider using a funnel or a squeeze bottle for pouring, especially if you’re worried about overshooting the crusts. If you do spill a little, don’t worry; a damp cloth can easily clean up any drips on the edges.
Importance of Cooling and Refrigeration in Setting the Pies
After filling the crusts, allow the mini pies to cool at room temperature for a short period before transferring them to the refrigerator. The cooling process is crucial because it allows the filling to set properly. Refrigerate the pies for at least 2-3 hours, or overnight if possible. The longer they chill, the firmer the filling will be, resulting in a more delightful texture when you bite into them.
Whipping Up the Cream Topping
While your pies are chilling, you can prepare the whipped cream topping. Start with cold heavy cream—this is key to achieving the best results. Use a chilled mixing bowl and beaters to help the cream whip up quickly and efficiently.
Techniques for Achieving Perfect Whipped Cream
Begin by pouring the cold cream into the mixing bowl. Add a tablespoon of powdered sugar and a splash of vanilla extract for sweetness and flavor. Start mixing on low speed to avoid splattering, then gradually increase to medium-high speed.
How to Achieve Stiff Peaks and the Ideal Texture for Topping
Whip the cream until it forms stiff peaks; this means when you lift the beaters, the peaks will stand upright without drooping. Be cautious not to over-whip, as this can lead to a grainy texture or even butter.
Once ready, use a piping bag with a star tip for a decorative touch when topping each mini pie. This will not only enhance the visual appeal but also make serving easier.
Garnishing and Serving Suggestions
To elevate your Mini Chocolate Cream Pies further, consider creative garnishing options. Chocolate shavings, cocoa powder dusting, or even fresh berries can add a pop of color and flavor. For a classic touch, a sprinkle of sea salt can enhance the chocolate flavor beautifully.
When serving, presentation matters. Arrange the mini pies on a decorative platter and consider adding a few mint leaves for a fresh element. They can also be served individually on small dessert plates with a fork for a more formal occasion.
Pairing Suggestions
Pair your Mini Chocolate Cream Pies with a rich cup of coffee or a glass of dessert wine. A robust Merlot or a sweet port can complement the chocolate beautifully. If you prefer a non-alcoholic option, consider serving them with a creamy hot chocolate or a milkshake for a delightful treat.
Nutritional Insights
When indulging in desserts, understanding their nutritional aspects can help you enjoy them mindfully. Each mini pie is a perfect single-serving size, making it easier to control portions.
Discussion on Portion Control with Mini Desserts
Mini desserts allow you to satisfy your sweet tooth without overindulging. These small treats offer just enough sweetness to curb cravings while still leaving room for a well-rounded meal.
Suggestions for Making Healthier Swaps
If you’re looking to make your Mini Chocolate Cream Pies a bit healthier, consider using low-fat cream for the filling or sugar substitutes to reduce calories. You can also experiment with alternative crusts, such as crushed nuts for a gluten-free option. Using dark chocolate with a higher cocoa percentage can also provide a richer flavor with less sugar.
Conclusion
Mini Chocolate Cream Pies are not just a dessert; they are a delightful experience that brings joy with every bite. Their rich chocolate filling, tender crust, and airy whipped cream topping create a symphony of flavors and textures that is hard to resist.
Encouraging creativity in your baking, these mini pies can be a canvas for flavor experimentation—think about adding a hint of espresso or a splash of liqueur for a unique twist.
Sharing these homemade treats with loved ones not only enhances your gatherings but also creates cherished memories. So gather your ingredients, roll up your sleeves, and enjoy the process of creating these delightful Mini Chocolate Cream Pies!


