

Crispy Hatch Chili Quesadillas: A Flavorful Delight
Crispy Hatch Chili Quesadillas are more than just a quick meal; they are a delightful fusion of flavors that showcase the best of Southwestern cuisine. This dish carries the vibrant essence of Hatch chiles, which are renowned for their unique taste and mild to medium heat. When combined with gooey, melted cheese and wrapped in a crispy tortilla, these quesadillas become an irresistible treat, perfect for both casual weeknight dinners and festive gatherings.
The Allure of Hatch Chiles
Hatch chiles, named after the Hatch Valley in New Mexico where they are grown, have become a beloved ingredient in many kitchens across the United States. Harvested during the late summer months, these chiles are celebrated for their rich, earthy flavor and varying heat levels. Whether you prefer them roasted, grilled, or fresh, Hatch chiles add a distinctive depth to any dish. Their unique profile makes them a standout ingredient in this quesadilla recipe, elevating it beyond the ordinary.
The appeal of Crispy Hatch Chili Quesadillas lies not only in their delicious taste but also in their versatility. This recipe is quick and easy to prepare, making it ideal for busy weeknights or last-minute gatherings. Moreover, the quesadilla can be customized with various ingredients according to personal preferences or dietary needs, allowing for endless possibilities that cater to every palate.
Understanding the Key Ingredients
To create the perfect Crispy Hatch Chili Quesadillas, it’s important to understand the role each key ingredient plays in the dish.
Flour Tortillas: The Foundation of Quesadillas
Flour tortillas serve as the backbone of any quesadilla, providing a soft yet sturdy canvas for the filling. Their pliable nature allows for easy folding and crisping, ensuring that each bite delivers a delightful crunch. When selecting tortillas, opt for fresh, high-quality varieties to enhance the overall texture and flavor of your dish.
Monterey Jack and Sharp Cheddar Cheese: Enhancing Flavor and Texture
Cheese is a quintessential element in quesadillas, and a blend of Monterey Jack and sharp cheddar cheese delivers both creaminess and a rich flavor profile. Monterey Jack melts beautifully, creating that gooey texture that quesadillas are known for, while sharp cheddar contributes a robust taste that balances the mildness of the Monterey Jack. Together, these cheeses create a harmonious blend that elevates the dish to new heights.
Hatch Green Chiles: Flavor, Heat Level, and Where to Find Them
The star of this recipe, Hatch green chiles, bring a unique flavor and a moderate heat that is suitable for most diners. They can be found fresh during their harvest season or canned for year-round use. When using fresh chiles, roasting them enhances their sweetness and adds a smoky flavor, which is particularly delicious in quesadillas. If you’re unable to find Hatch chiles locally, consider using other mild green chiles as a substitute, but be aware that the flavor will differ.
Benefits of Adding Black Beans: Nutritional Value and Added Protein
Incorporating black beans into your quesadilla filling not only boosts the nutritional value but also adds a satisfying texture. Rich in protein and fiber, black beans can help make the quesadillas more filling, making them an excellent option for a hearty meal. Their earthy flavor complements the Hatch chiles and cheese, creating a well-rounded filling.
Fresh Cilantro: Flavor Enhancement and Garnishing
A sprinkle of fresh cilantro adds a burst of freshness that brightens the entire dish. Its slightly citrusy flavor pairs wonderfully with the heat of the chiles and the richness of the cheese, providing balance and complexity. Cilantro also serves as an appealing garnish, enhancing the visual appeal of your Crispy Hatch Chili Quesadillas.
Overview of Spices: Ground Cumin, Garlic Powder, Onion Powder, Salt, and Pepper
To elevate the flavor profile further, a blend of spices is essential. Ground cumin adds warmth and depth, while garlic powder and onion powder provide aromatic sweetness. A pinch of salt enhances all the flavors, and freshly cracked pepper adds a touch of heat. This thoughtful combination of spices ensures that each bite of your quesadilla is bursting with flavor.
Preparing the Filling
Now that we’ve covered the essential ingredients, it’s time to prepare the filling for our Crispy Hatch Chili Quesadillas. The key to a delicious filling lies in the balance of flavors and textures. Here’s a step-by-step guide to mixing the ingredients:
1. Roast the Hatch Chiles: Begin by roasting the Hatch chiles. You can do this on a gas burner, under the broiler, or on a grill, turning them until the skin is charred and blistered. Once done, place them in a sealed plastic bag for about 10 minutes to steam, which will make peeling easier. Afterward, remove the skins, seeds, and stems, and chop the chiles into small pieces.
2. Combine the Ingredients: In a large mixing bowl, combine the chopped Hatch chiles, drained black beans, grated Monterey Jack cheese, and sharp cheddar cheese. This combination will create a filling that is both creamy and rich, with the Hatch chiles adding a unique burst of flavor.
3. Season the Mixture: Sprinkle in the ground cumin, garlic powder, onion powder, salt, and pepper. Mix well to ensure that the spices are evenly distributed throughout the filling. This step is crucial for achieving a well-balanced flavor profile in your quesadillas.
4. Check the Consistency: The filling should be thick enough to hold its shape but not so dense that it becomes difficult to spread on the tortillas. If the mixture feels too dry, consider adding a small amount of olive oil or even a splash of lime juice for added moisture and brightness.
By following these steps, you’ll create a filling that not only tastes fantastic but also has the right texture for your quesadillas. The next step will be assembling the quesadillas, which promises to be just as satisfying as the preparation process.
Detailed Instructions on How to Properly Assemble Quesadillas
Assembling quesadillas may seem straightforward, but the way you layer your ingredients can significantly impact the final product. To properly assemble your crispy Hatch chili quesadillas, follow these steps:
1. Choose Your Tortilla: Begin with a large flour tortilla for the best results. The size allows for ample filling while maintaining structural integrity.
2. Spread the Cheese: Start by sprinkling a generous layer of shredded cheese (such as Monterey Jack or a Mexican blend) on one half of the tortilla. This acts as a glue to hold your filling in place.
3. Add the Filling: Next, layer your sautéed Hatch chilis, black beans, and any additional ingredients you desire, such as corn or diced tomatoes. Ensure that the filling is evenly distributed but avoid overfilling to prevent spillage during cooking.
4. Top with More Cheese: Add another layer of cheese on top of the filling. This not only enhances flavor but also creates a melty barrier to seal in the ingredients.
5. Fold the Tortilla: Carefully fold the tortilla in half over the filling, pressing down gently to secure the layers. This helps ensure that the filling remains evenly distributed and minimizes the risk of any ingredients escaping during cooking.
Techniques for Ensuring Even Filling Distribution
Even distribution of filling is crucial for achieving the perfect quesadilla. Here are some techniques to ensure that every bite is flavorful:
– Use a Spatula: After placing the filling on one half of the tortilla, use a spatula to spread the ingredients evenly. This guarantees that every bite has a balanced flavor profile.
– Layer Strategically: Start with cheese, then add your fillings, and finish with another layer of cheese. Cheese acts as a binder and helps keep the filling in place, preventing it from spilling out when you cook the quesadilla.
Importance of Pressing Down on the Quesadilla for Optimal Cooking
Pressing down on the quesadilla is an essential step that often gets overlooked. Not only does this technique help in achieving even cooking, but it also aids in creating a crispy texture. Here’s why it’s important:
– Promotes Even Cooking: By pressing down, you ensure that the entire surface of the quesadilla makes contact with the skillet, allowing for uniform cooking.
– Enhances Crispiness: The more you press down, the more compact the quesadilla becomes, which helps create a crunchy exterior while keeping the inside melty and delicious.
Cooking Techniques for Perfect Quesadillas
When it comes to cooking your quesadillas, you have options. Understanding the pros and cons of frying versus baking can help you choose the best method for your needs.
Overview of Frying vs. Baking: Pros and Cons of Each Method
– Frying:
– Pros: Frying quesadillas yields a crispy texture quickly. The direct heat allows for rapid browning, creating a delightful crunch.
– Cons: This method can be more calorie-dense due to the oil used and requires constant attention to avoid burning.
– Baking:
– Pros: Baking is a healthier alternative that requires no added oil, making it lower in calories. It also allows for hands-free cooking, freeing you up to prepare other dishes.
– Cons: The texture may not be as crispy as fried quesadillas, and it can take longer to achieve the desired browning.
Step-by-Step Guide on Frying Quesadillas in a Skillet
If you opt to fry your quesadillas for that unbeatable crispiness, follow these steps:
1. Preheat the Skillet: Heat a non-stick skillet over medium heat. Allow it to warm up for a few minutes to ensure even cooking.
2. Add Oil: Add a tablespoon of cooking oil (such as vegetable or canola oil) to the skillet. Swirl it around to coat the bottom evenly.
3. Cook the Quesadilla: Place the assembled quesadilla in the hot skillet. Cook for about 3-4 minutes or until the bottom is golden brown and crispy.
4. Flip with Care: To flip the quesadilla, use a wide spatula to gently lift one side. Slide the spatula under the quesadilla and flip it over in one swift motion. This technique helps prevent the filling from spilling out.
5. Finish Cooking: Cook the other side for another 3-4 minutes until it’s golden brown and the cheese is melted. If you notice the quesadilla browning too quickly, lower the heat to prevent burning.
Explanation of Heat Management to Achieve Golden-Brown Crispiness
Achieving that perfect golden-brown crust requires careful attention to heat levels:
– Medium Heat is Key: Keep your skillet at a medium heat to allow the quesadilla to cook evenly without burning. Too high of a heat will result in a charred exterior while leaving the inside cold.
– Adjust as Necessary: If you find that the quesadilla is browning too quickly, reduce the heat slightly. This will allow the cheese to melt thoroughly while ensuring the tortilla doesn’t burn.
Tips for Flipping Quesadillas Without Losing the Filling
Flipping quesadillas can be tricky, but with a few tips, you can do it with ease:
– Use Two Spatulas: If you’re worried about losing filling during the flip, use two spatulas to support the quesadilla. Place one spatula under the quesadilla and use the other to guide it during the flip.
– Flip from the Edge: Instead of flipping the quesadilla from the center, lift one edge and let it pivot from that point. This method minimizes disturbance to the filling.
Serving Suggestions
Presentation can elevate your crispy Hatch chili quesadillas from ordinary to extraordinary. Here are some ideas to make your dish visually appealing:
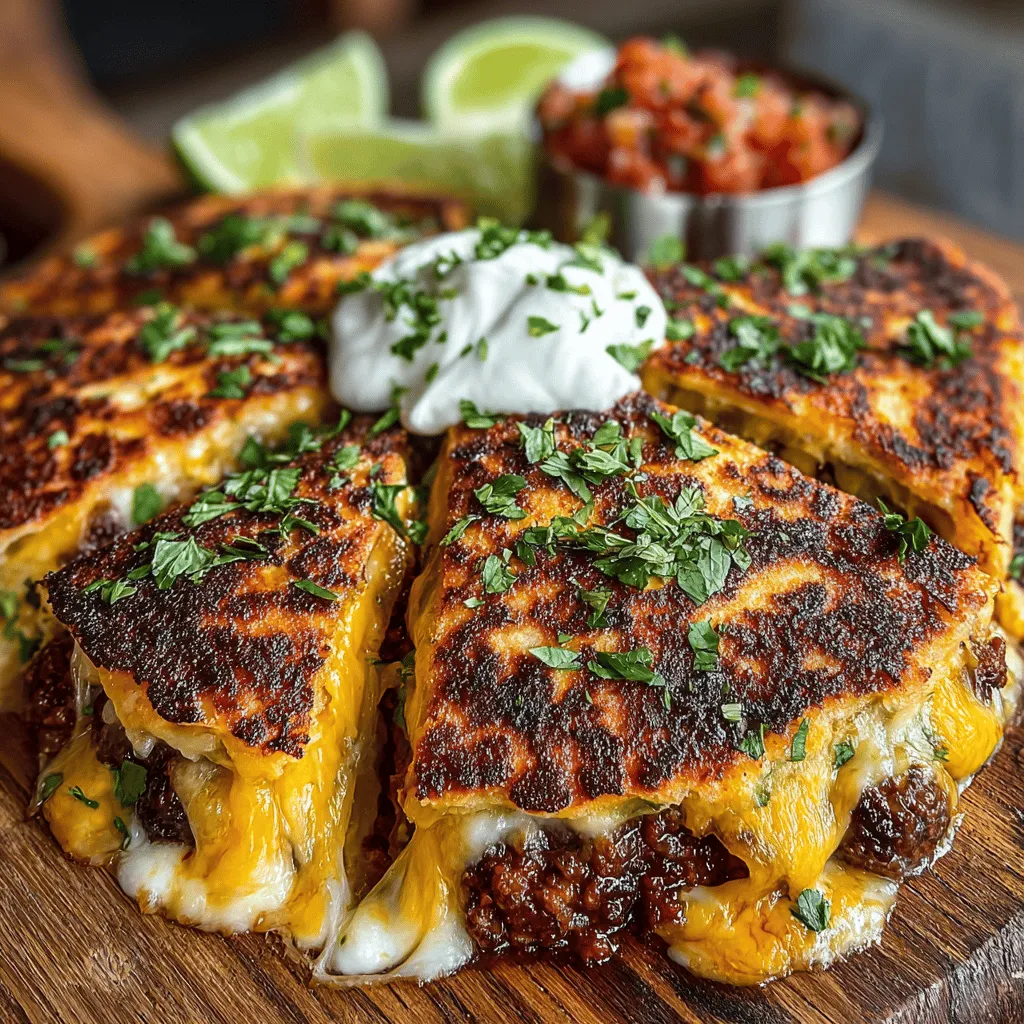
– Plating: Cut the quesadilla into wedges for easy serving. Arrange them on a colorful plate with a sprinkle of fresh cilantro or parsley for a pop of color.
– Suggested Accompaniments: Serve your quesadillas with a side of sour cream, fresh salsa, and lime wedges. The acidity of the lime complements the richness of the cheese, while the salsa adds freshness.
– Ideas for Additional Toppings or Sides: Consider topping your quesadillas with sliced avocados, pickled jalapeños, or a drizzle of hot sauce for added flavor. A side of Mexican street corn or a simple green salad can round out the meal beautifully.
Nutritional Information
Understanding the nutritional profile of your crispy Hatch chili quesadillas can help you make informed choices:
– Overview of the Calorie Count: A typical serving (one quesadilla) contains approximately 400-500 calories, depending on the amount of cheese and additional fillings used.
– Nutritional Benefits: This dish offers a good source of protein from the cheese and beans, along with dietary fiber from the black beans and vegetables. Hatch chilis also provide vitamins A and C, contributing to your overall health.
Discussion on How to Make the Dish Healthier or Cater to Dietary Restrictions
To cater to various dietary needs or make the quesadillas healthier:
– Use Whole Wheat Tortillas: Opting for whole wheat tortillas can increase fiber content and provide more nutrients.
– Cheese Alternatives: For a lower-calorie option, consider using reduced-fat cheese or dairy-free alternatives to accommodate lactose intolerance.
– Add More Veggies: Increase the vegetable content by adding spinach, bell peppers, or zucchini to the filling for added nutrition.
Conclusion
Crispy Hatch chili quesadillas are not just a meal; they’re an experience filled with flavor and texture that’s sure to impress. Their versatility allows for endless customization, making them a fantastic addition to your weekly meal rotation. Whether enjoyed as a casual dinner or served at a gathering with friends and family, these quesadillas promise a delightful culinary experience.
Encourage everyone to try their hand at making this recipe, and don’t forget to share the joy of cooking with your loved ones. The combination of crispy tortillas, savory filling, and gooey cheese will surely make these quesadillas a favorite in your home. Enjoy the process, savor the flavors, and most importantly, share the deliciousness with those around you!
