Introduction
In recent years, baked snacks have surged in popularity, offering a delicious alternative to their fried counterparts. As health-conscious consumers seek out options that satisfy cravings without the extra calories, baked snacks have found their way into our hearts and pantries. Among these, baked pickle chips stand out as a delightful, tangy treat that’s not only satisfying but also versatile enough to serve in a variety of ways.
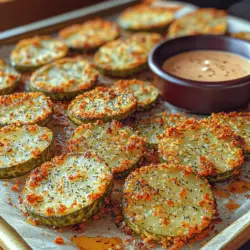
Enter the Crunchy Dill Delight: Crispy Baked Pickle Chips. This recipe presents a fantastic way to enjoy the classic flavor of dill pickles in a crunchy, baked format. Whether you’re looking for an appetizer to impress guests at your next gathering, a quick snack to satisfy midday munchies, or a unique party treat, these pickle chips are sure to be a hit.
One of the best aspects of this recipe is its simplicity. Using common kitchen ingredients, you can whip up a batch of these baked pickle chips in no time. Plus, they’re an excellent option for anyone looking to indulge without the guilt associated with traditional fried snacks.
Understanding the Ingredients
To create the perfect Crunchy Dill Delight, it’s essential to understand the key ingredients that come together to make these baked pickle chips not only tasty but also irresistibly crunchy.
Dill Pickle Slices
The star of this recipe is, of course, the dill pickle slices. While you can use any type of dill pickle, the flavor profile can vary significantly depending on the variety you choose. For a classic taste, opt for sandwich slices, which are thicker and provide a satisfying crunch. If you prefer a more intense flavor, consider using garlic dill pickles or even spicy varieties that can add a kick to your chips. Regardless of the type you choose, the tangy and briny flavor of dill pickles is what makes this snack so appealing.
All-Purpose Flour
All-purpose flour serves as the first layer in the breading process. It plays a crucial role in creating a base that helps the other coating ingredients adhere to the pickle slices. The flour absorbs some moisture from the pickles, allowing for a better binding effect when combined with the eggs and breadcrumbs. This not only enhances the texture but also contributes to the overall crunchiness of the final product.
Eggs
In this recipe, eggs act as the binding agent. Once the pickle slices are coated in flour, they are dipped into beaten eggs before being rolled in breadcrumbs. The protein in the eggs forms a sticky layer, ensuring that the breadcrumbs cling to the pickles during baking. This step is vital in achieving that crispy exterior that everyone loves.
Breadcrumbs
For that satisfying crunch, panko breadcrumbs are the preferred choice in this recipe. Panko, a Japanese-style breadcrumb, is coarser and lighter than traditional breadcrumbs, which contributes to a more textured and crispy finish. However, if panko is unavailable, you can use regular breadcrumbs or even crushed cornflakes as alternatives. Just keep in mind that the texture may vary slightly depending on your choice.
Seasonings
To elevate the flavor of your baked pickle chips, a blend of seasonings is essential. Garlic powder, onion powder, smoked paprika, black pepper, and salt work harmoniously to enhance the natural taste of the pickles while adding depth and complexity. The smoked paprika, in particular, brings a subtle smokiness that complements the tangy pickles beautifully. Adjust the seasonings according to your preference, and don’t hesitate to experiment with additional spices to create a flavor profile that suits your palate.
Cooking Spray or Olive Oil
While baked snacks are healthier than fried ones, a little fat is necessary for achieving that coveted crispiness. Lightly spraying the coated pickle chips with cooking spray or drizzling them with olive oil before baking helps to promote browning and crispiness. This step is crucial to ensure that your Crunchy Dill Delights come out of the oven perfectly golden and delicious.
Preparation Steps for the Perfect Baked Pickle Chips
To achieve the ideal Crunchy Dill Delight, proper preparation is key. Follow these steps to ensure your baked pickle chips turn out crispy and flavorful.
Preheating the Oven
Begin by preheating your oven to 425°F (220°C). The importance of this step cannot be overstated, as the right temperature is essential for achieving that crispy texture. When the oven is preheated, the heat will help to quickly evaporate moisture from the pickle slices, resulting in a crunchier chip.
Preparing the Pickles
Before you can start breading your pickle slices, it’s crucial to prepare them properly. Drain the pickle slices thoroughly and pat them dry using paper towels. Excess moisture can hinder the breading process and result in soggy chips. By ensuring the slices are dry, you allow the flour and breadcrumbs to adhere better, which contributes significantly to the final texture of the chips.
Setting Up the Breading Station
An efficient workflow can make the breading process smoother. Set up your breading station with three shallow bowls: one for all-purpose flour, another for beaten eggs, and the third for panko breadcrumbs mixed with the seasonings.
1. First Bowl: Add a sufficient amount of all-purpose flour, seasoned lightly with salt and pepper.
2. Second Bowl: Beat a couple of eggs until smooth. You can add a splash of water or milk to make the mixture a bit thinner, which can help with coating.
3. Third Bowl: Combine panko breadcrumbs with your selected seasonings, ensuring an even distribution for consistent flavor in every bite.
Organizing your ingredients in this manner not only saves time but also reduces the mess, making the breading process more enjoyable and efficient.
Tips for Organizing the Process
To streamline your workflow, consider the following tips:
– Use One Hand for Wet and One for Dry: When breading, use one hand for dipping pickles in the flour and egg, and the other for coating them in breadcrumbs. This method minimizes the mess and keeps your hands cleaner.
– Work in Batches: Bread a few slices at a time rather than all at once. This way, you can focus on ensuring each slice is adequately coated without feeling rushed.
– Place on a Baking Sheet: Once coated, arrange the breaded pickle slices in a single layer on a baking sheet lined with parchment paper. This prevents sticking and allows for even cooking.
By following these preparation steps, you’re well on your way to creating a batch of crispy, flavorful baked pickle chips that will surely impress anyone who tries them. The next section will walk you through the breading process, ensuring that your Crunchy Dill Delights achieve the perfect level of crunch and flavor.
Techniques for Effective Dredging and Coating
Creating the perfect Crunchy Dill Delight starts with mastering the dredging and coating technique. This method ensures that your pickle chips are not only flavorful but also achieve that coveted crispy texture.
The Dredging Process
Begin by preparing three separate shallow bowls: one for the all-purpose flour, one for the beaten eggs, and another for the seasoned breadcrumbs. The order of dredging is crucial: first, coat each pickle slice in flour, shaking off any excess. This initial layer of flour helps the egg adhere better to the pickle.
Importance of Pressing Breadcrumbs
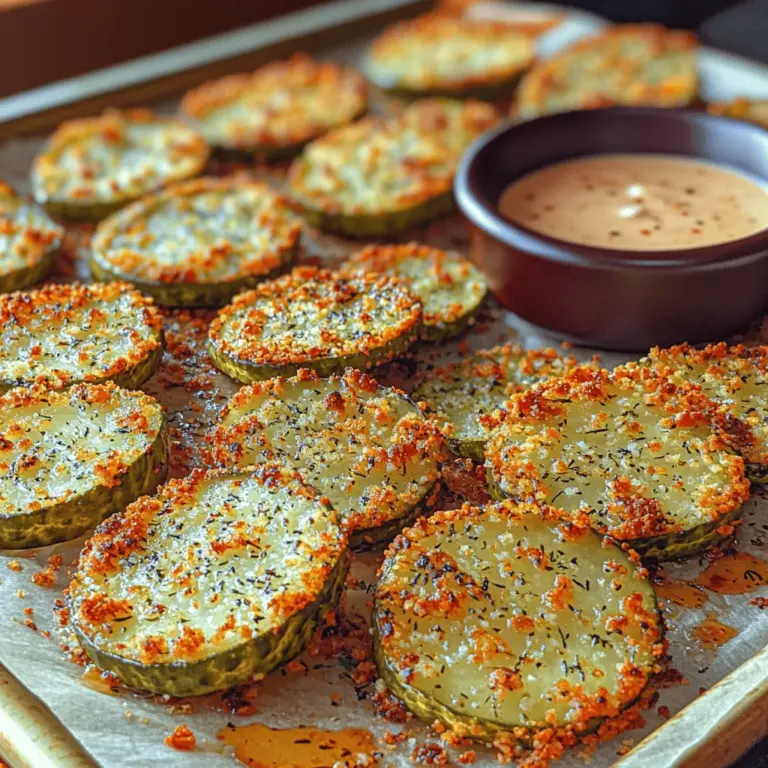
After the flour and egg baths, it’s time to coat the pickles in breadcrumbs. This step is where the magic happens. Take each pickle chip and press it firmly into the breadcrumbs, ensuring that they are well-coated. This pressing technique is essential because it allows the breadcrumbs to stick better, resulting in a crunchier finish after baking.
Visual Cues During Breading
Throughout the breading process, look for a few visual indicators to ensure success. The pickle slices should be fully covered in flour without any gaps, and the egg should create a glossy layer before you apply the breadcrumbs. When you press the breadcrumbs onto the pickles, they should adhere tightly; if they fall off easily, you may need to dip the pickles back in the egg and re-coat them.
Baking the Pickle Chips
Arranging the Breaded Pickles
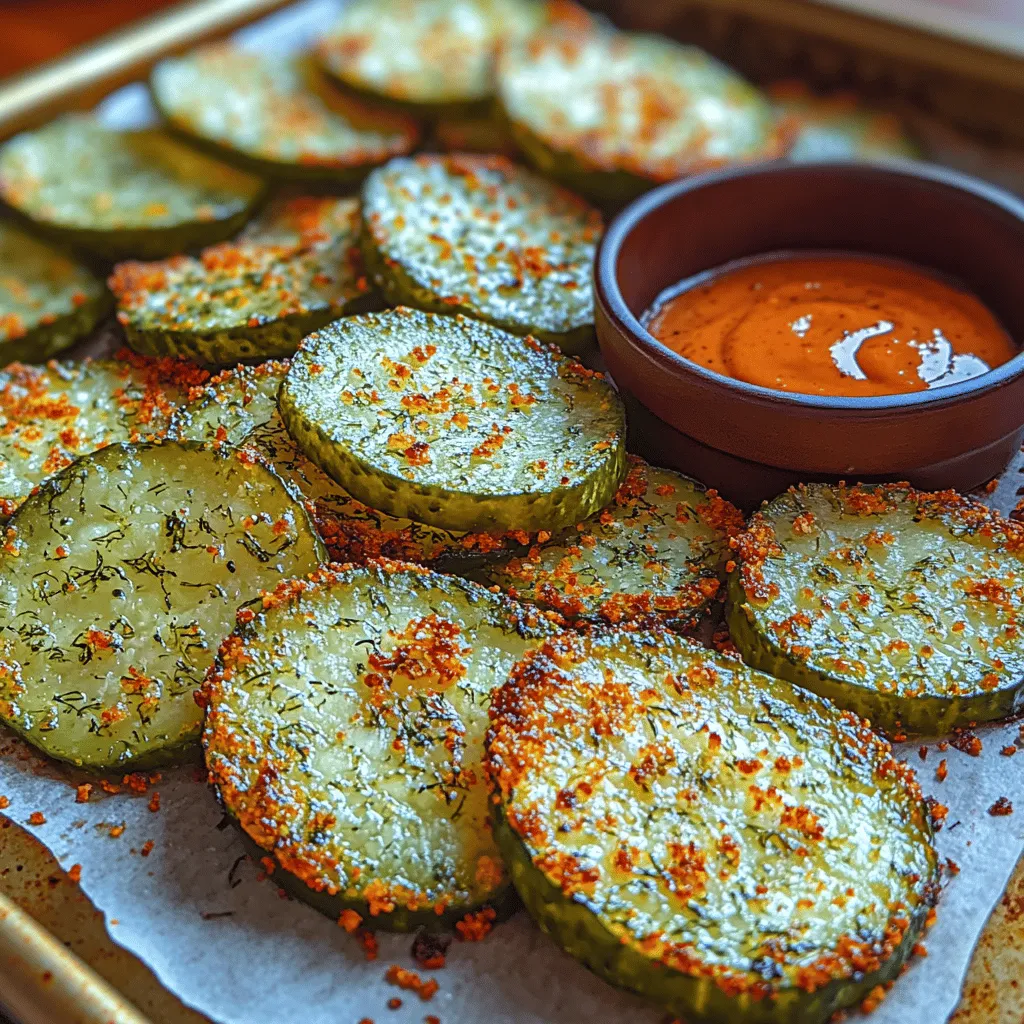
Once your pickle chips are breaded, it’s time to prepare for baking. Arrange them on a parchment-lined baking sheet, ensuring that they are spaced apart. Proper spacing is crucial for even cooking; if the pickle chips are too close together, they will steam rather than bake, resulting in a soggy texture rather than a crisp one.
Techniques for Even Baking and Crispiness
To achieve the ultimate crunch, consider these baking techniques:
1. Preheat the Oven: Always preheat your oven to 425°F (220°C) before placing the baking sheet inside. This helps to create an immediate heat that crisps the outsides of the chips.
2. Use a Wire Rack: If you have one, placing a wire rack on the baking sheet allows hot air to circulate around the pickle chips, promoting even baking and preventing moisture accumulation.
Flipping for Even Cooking
During the baking process, it’s advisable to flip the pickle chips halfway through cooking. This not only ensures that both sides achieve an even golden brown but also helps to maintain the crispiness that you desire. Use a spatula to gently turn each chip, being careful not to disturb the breadcrumb coating.
Baking Time for Perfection
Bake the pickle chips for about 20 to 25 minutes, depending on your oven’s efficiency. Keep a close eye on them, especially towards the end of the baking time. The ideal finish is a golden brown color, indicating that they are perfectly cooked and ready to be enjoyed.
Serving Suggestions and Pairings
Once out of the oven, your Crunchy Dill Delight pickle chips are ready to be served! Here are some fantastic pairing ideas to enhance your snacking experience.
Ideal Dipping Sauces
A variety of dipping sauces can elevate your pickle chips from a simple snack to a gourmet experience. Here are some crowd-pleasers:
– Ranch Dressing: A classic choice, ranch dressing complements the tangy flavor of pickles beautifully.
– Spicy Mayo: For those who enjoy a kick, mix mayonnaise with sriracha or your favorite hot sauce for a zesty dip.
– Tangy Mustard: A punchy mustard can balance the crunchiness of the chips while adding a nice zing.
– Creamy Garlic Dip: Blend sour cream with garlic powder, lemon juice, and herbs for a refreshing alternative.
Creative Serving Ideas
These pickle chips are versatile and can be served in various ways:
– Appetizers for Parties: Set out a platter of crunchy pickle chips with an assortment of dips for guests to enjoy at your next gathering.
– Snacks for Movie Nights: Serve them alongside popcorn and other finger foods for a fun movie night spread.
– Game Day Treats: Perfect for cheering on your favorite team, these baked pickle chips make for a delightful snack during the big game.
Nutritional Insights
Baked pickle chips not only satisfy cravings but also offer nutritional benefits compared to their fried counterparts.
Overview of Nutritional Profile
A serving of baked pickle chips is lower in calories and fat than traditional fried pickle chips. For example, a serving of baked pickle chips typically contains around 150 calories, while a similar serving of fried pickles can exceed 300 calories.
Comparison to Fried Alternatives
The primary difference lies in the cooking method. Baking reduces the amount of oil absorbed into the food, resulting in a healthier snack option that still delivers on flavor and crunch.
Health Benefits of Pickles
Pickles themselves are low in calories and can be a good source of antioxidants. They are also a source of probiotics, which can aid in digestion. Opting for baked varieties means enjoying these benefits without the excess fat often found in fried snacks.
Dietary Considerations
For those watching their calorie intake or looking for gluten-free options, these baked pickle chips can easily be adapted. Substitute regular all-purpose flour for almond flour or a gluten-free blend, and ensure your breadcrumbs are gluten-free as well.
Conclusion
In summary, making Crunchy Dill Delight baked pickle chips is both easy and rewarding. With a few simple steps, you can create a delicious snack that’s perfect for any occasion. The combination of crispy texture, tangy flavor, and customizable dipping sauces makes these chips a delightful treat everyone can enjoy.
Feel free to experiment with different seasonings in your breadcrumbs or try various dipping sauces to suit your taste. The joy of homemade snacks lies in their versatility, allowing you to create a unique experience each time you whip up a batch. So gather your ingredients, follow the steps, and enjoy the satisfaction that comes from crafting your very own crispy baked pickle chips!