Frozen Yogurt Raspberry Swirl Pops Recipe
As the warm months approach, the craving for frozen treats often intensifies. There’s something undeniably refreshing about enjoying a cool snack on a hot day—especially one that brings a burst of flavor and satisfaction. While ice cream has long held the title of the go-to summer indulgence, frozen yogurt has gained popularity as a healthier alternative. With its creamy texture and tangy flavor, frozen yogurt not only satisfies sweet cravings but also offers a more nutritious option compared to traditional ice cream.
Homemade frozen treats, such as popsicles, take the concept of healthy snacking a step further. By making your own frozen yogurt pops, you gain full control over the ingredients, ensuring freshness and avoiding unnecessary additives or preservatives often found in store-bought options. This means you can enjoy a delicious treat that aligns with your dietary preferences and health goals.
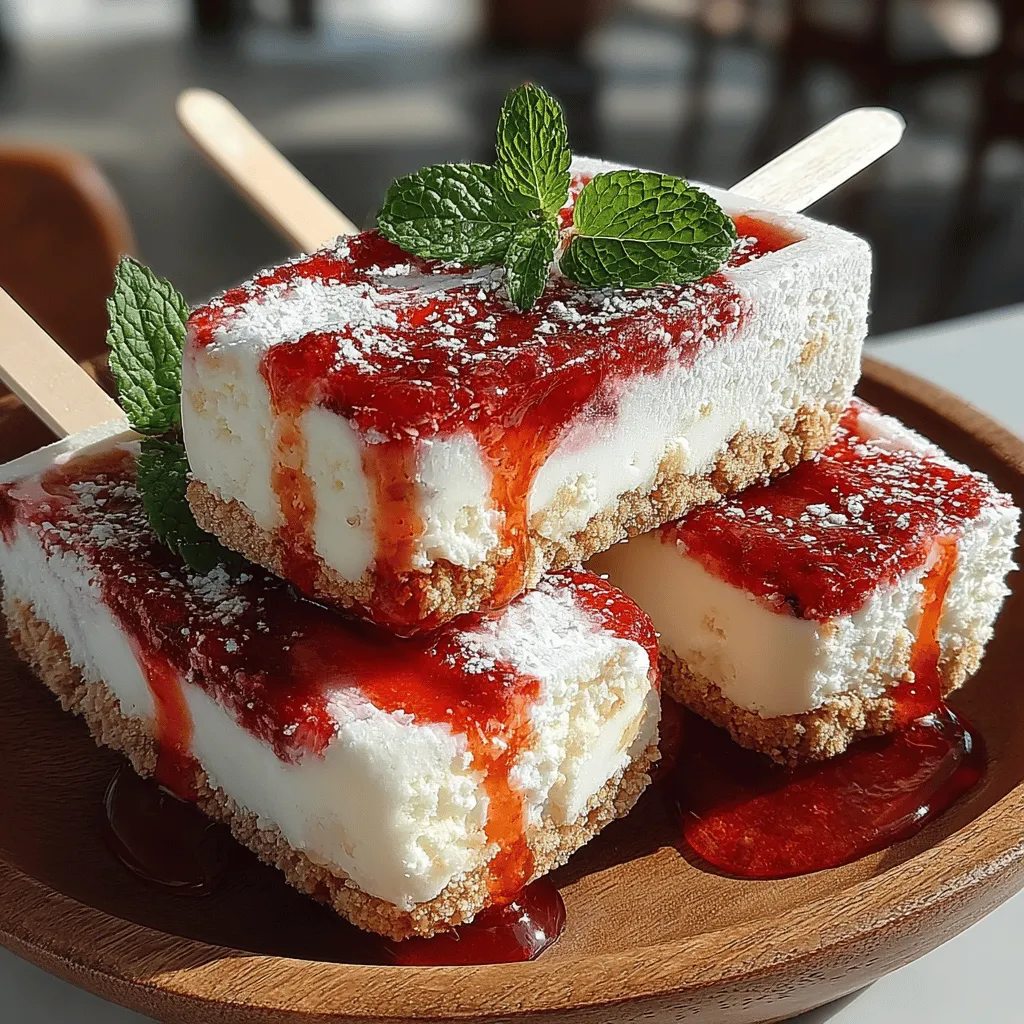
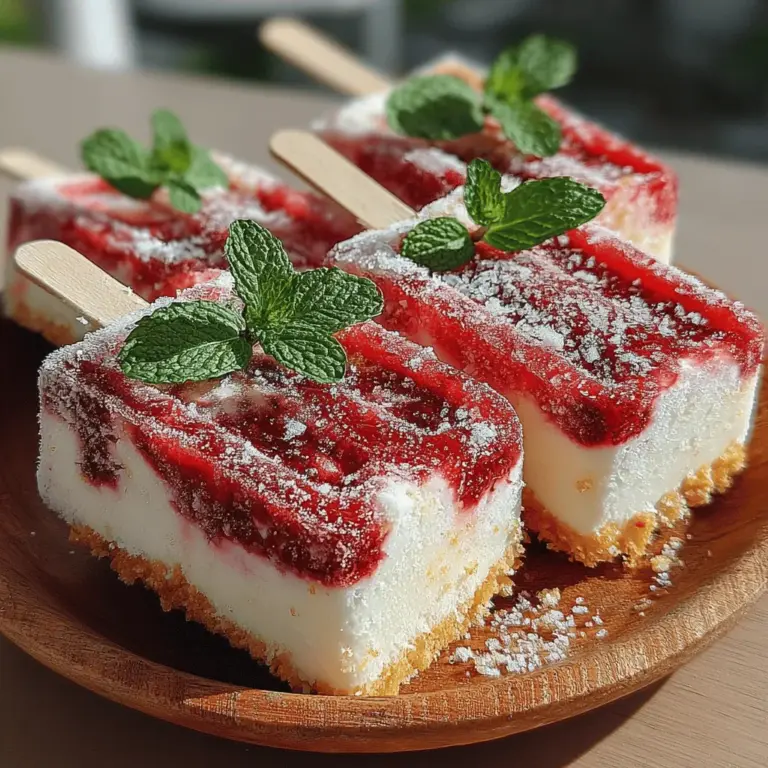
Introducing the Frozen Yogurt Raspberry Swirl Pops—a delightful blend of creamy Greek yogurt and tart, vibrant raspberries. These popsicles are not only a feast for the taste buds but also a visual delight, with their striking swirls of red and white. They encapsulate the essence of summer, making them an ideal choice for family gatherings, picnics, or simply a refreshing snack on a sunny afternoon.
Understanding the Ingredients
Before diving into the preparation, it’s essential to understand the ingredients that contribute to the delightful flavor and nutritional profile of these pops. Each component plays a significant role in creating the perfect balance of taste and texture.
Plain Greek Yogurt: At the heart of this recipe lies plain Greek yogurt, a powerhouse of nutrition. Packed with protein, it not only contributes to the creamy texture of the pops but also helps keep you feeling full. Additionally, Greek yogurt is rich in probiotics, promoting gut health and aiding digestion. Its natural tartness complements the sweetness of the raspberries, creating a well-rounded flavor profile.
Honey or Maple Syrup: To sweeten the mixture, you can choose between honey or maple syrup, both of which are natural sweeteners. These alternatives to refined sugar come with their own set of health benefits. Honey is known for its antimicrobial properties and is a great source of antioxidants, while maple syrup contains essential minerals like manganese and zinc. Adjusting the amount of sweetener allows you to customize the pops to your taste preferences.
Vanilla Extract: A splash of vanilla extract enhances the overall flavor of the yogurt base, providing a warm, aromatic sweetness that pairs beautifully with both the yogurt and raspberries. Opting for pure vanilla extract over imitation versions ensures the best quality of flavor.
Raspberries: The star of the show, raspberries, bring a delightful tartness that contrasts beautifully with the creamy yogurt. These berries are not only delicious but also packed with nutritional benefits, including high levels of antioxidants, vitamins C and K, and dietary fiber. Their vibrant color adds aesthetic appeal to the pops, making them visually enticing.
Lemon Juice: A squeeze of fresh lemon juice is essential in this recipe, as it helps to balance the flavors and enhance the natural taste of the raspberries. The acidity from the lemon brightens the overall flavor profile, making each bite a refreshing experience.
Salt: While it might seem counterintuitive to add salt to a sweet treat, a pinch of salt plays a vital role in flavor enhancement. It can help to elevate the sweetness and provide depth to the overall taste, ensuring that the flavors are well-rounded.
Optional Garnish: For an extra touch of freshness and visual appeal, consider garnishing your pops with mint leaves. The bright green color offers a striking contrast against the pink raspberry swirls, and the mint adds a refreshing note that complements the flavors beautifully.
Step-by-Step Guide to Making Frozen Yogurt Raspberry Swirl Pops
Now that we’ve explored the ingredients, let’s dive into the step-by-step process of creating these mouthwatering Frozen Yogurt Raspberry Swirl Pops.
Preparing the Yogurt Base
Start by gathering your ingredients. In a mixing bowl, combine the plain Greek yogurt, honey or maple syrup, vanilla extract, and a pinch of salt. Using a whisk or an electric mixer, blend the ingredients until smooth and creamy. The goal is to achieve a uniform consistency that is easy to spoon into your molds.
Adjust the sweetness according to your personal preference. If you love a sweeter treat, feel free to add a little more honey or maple syrup. Taste the mixture before proceeding to ensure it meets your desired flavor profile.
Creating the Raspberry Swirl
In a separate bowl, prepare the raspberry swirl. Take fresh raspberries and gently mash them with a fork or potato masher. Be careful not to over-mash them; you want to retain some texture for a pleasing mouthfeel. Once mashed, add a few drops of lemon juice to the raspberries. This will not only enhance the flavor but also help brighten the vibrant red hue of the fruit.
Layering the Mixtures
Now comes the fun part—layering the yogurt and raspberry mixtures to create the beautiful swirl effect. Begin by spooning a layer of the yogurt base into your popsicle molds, filling them about a third of the way full. Next, add a layer of the mashed raspberry mixture, followed by another layer of yogurt. Repeat this process until the molds are nearly full, finishing with a raspberry layer on top.
To achieve that coveted marbled effect, take a skewer or a popsicle stick and gently swirl it through the layers. Be careful not to over-mix; you want to create a beautiful blend of yogurt and raspberry without losing the distinct layers.
With the layers in place, insert popsicle sticks into the molds and place them in the freezer. Allow the pops to freeze for at least 4-6 hours, or until they are completely solid.
Stay tuned for Part 2, where we will explore the final touches to your Frozen Yogurt Raspberry Swirl Pops, including tips for removing them from the molds and serving suggestions that will make your homemade treats even more delightful!

Making your own frozen yogurt raspberry swirl pops is not only a fun activity but also a chance to create a delicious and healthy treat that can be enjoyed by everyone. In this section, we will delve into the important steps for achieving the perfect swirl, tips for easy unmolding, and creative variations to keep your pops exciting. Let’s get started!
Suggestions for Proportioning Yogurt and Raspberry Mixtures for Visual Appeal
Achieving a beautiful swirl in your pops is all about the right proportions of yogurt and raspberry mixtures. To create a stunning visual effect, aim for a 1:1 ratio of yogurt to raspberry puree. This balance ensures that each pop showcases an enticing marbled design.
When layering the mixtures into the molds, start by adding a spoonful of yogurt to the bottom, followed by a spoonful of raspberry puree. Alternate these layers, gently swirling a skewer or toothpick through the mixtures to create a marbled effect without overmixing. The goal is to have distinct pockets of raspberry and yogurt visible, which not only looks appealing but also enhances the flavor experience with each bite.
Freezing Process
Once your molds are filled, it’s time to freeze your pops. Proper freezing is crucial for achieving the right texture. Place your filled molds in the freezer upright and ensure they are spaced apart to allow for even freezing. This helps avoid any uneven texture or difficulty in unmolding later.
Importance of Inserting Sticks Correctly for Stability
Inserting the popsicle sticks at the right time is essential for stability. After about 1-2 hours in the freezer, when the mixture has started to set but is still pliable, carefully insert the sticks into the center of each mold. This timing ensures that the sticks remain upright and centered as the pops freeze completely. If inserted too early, the sticks may fall over; if too late, the mixture could be too hard to penetrate.
Time Considerations for Achieving a Perfect Freeze
To achieve the perfect freeze, allow the pops to freeze for at least 4-6 hours. However, for best results, it’s advisable to leave them overnight. This extended freezing time ensures that the pops are firm and ready for easy unmolding, making them less likely to break apart when you try to remove them.
Unmolding and Serving
When it’s time to enjoy your frozen yogurt raspberry swirl pops, the unmolding process should be smooth and effortless.
Techniques for Easy Removal from Molds Without Damage
To easily remove your pops from the molds, run warm water over the outside of the molds for a few seconds. This will slightly melt the outer layer of the pops, making them easier to slide out. Alternatively, you can gently twist the molds to release the pops. Avoid using excessive force, which could lead to breakage.
Presentation Ideas, Including Garnishing with Mint Leaves
Once unmolded, presentation is key to elevating your homemade treats. Arrange the pops on a platter and garnish them with fresh mint leaves for a pop of color and added freshness. You can also sprinkle some crushed nuts or granola around the pops for added texture. For an extra touch, drizzle some additional raspberry puree or a light honey glaze over the top just before serving.
Nutritional Benefits of Frozen Yogurt Raspberry Swirl Pops
These frozen yogurt raspberry swirl pops are not just visually appealing but also packed with nutritional benefits.
Breakdown of the Nutrients in Each Serving
Each serving of these pops is rich in protein from the yogurt, vitamins from the raspberries, and probiotics that contribute to gut health. A standard pop contains approximately:
– Calories: 80-100
– Protein: 3-5 grams
– Fat: 2-3 grams (depending on the yogurt used)
– Carbohydrates: 15-20 grams
– Fiber: 1-2 grams
This makes them a healthier alternative to many commercially available frozen treats.
Comparison with Store-bought Frozen Treats in Terms of Sugar and Additives
When compared to store-bought frozen treats, homemade frozen yogurt pops come out on top. Many commercial options are laden with added sugars, artificial flavors, and preservatives. In contrast, your homemade pops contain natural ingredients, allowing you to control the sugar content and avoid unnecessary additives.
Discuss the Advantages of Using Whole, Unprocessed Ingredients
Using whole, unprocessed ingredients not only enhances the flavor but also maximizes the health benefits. You know exactly what goes into each pop, ensuring that your family enjoys a wholesome snack without any hidden ingredients. This transparency can encourage healthier eating habits and empower you to experiment with flavors and ingredients.
Creative Variations on the Recipe
Once you’ve mastered the basic recipe, consider experimenting with creative variations to keep things fresh and exciting.
Suggestions for Alternative Fruits to Incorporate
While raspberry is a fantastic choice, you can easily swap it for other fruits to suit your taste preferences. Strawberries, blueberries, or peaches all work wonderfully in this recipe. Simply puree your chosen fruit in the same way as the raspberries and layer them with the yogurt.
Options for Flavor Variations
For additional flavor complexity, try using flavored yogurts such as vanilla or coconut. You can also incorporate spices like cinnamon or ginger for a unique twist. These flavors can enhance the overall taste profile of your pops while still keeping them light and refreshing.
Ideas for Mix-ins to Enhance Texture
To add texture, consider folding in mix-ins such as granola, shredded coconut, or mini chocolate chips into your yogurt mixture before layering it into the molds. This not only provides a delightful crunch but also adds an element of surprise with each bite.
Serving Suggestions and Pairings
These frozen yogurt raspberry swirl pops are perfect for various occasions and can be served in multiple ways.
Ideas for Serving Frozen Yogurt Raspberry Swirl Pops at Gatherings or as a Refreshing Snack
Serve the pops at summer gatherings or BBQs as a refreshing dessert option. They’re easy to hold and eat, making them a hit with both kids and adults. You can also pack them in lunch boxes as a cool treat for kids during hot school days.
Beverage Pairings that Complement the Pops
To elevate your dessert experience, pair the pops with refreshing beverages. Herbal teas, such as hibiscus or chamomile, complement the fruity flavors beautifully. Alternatively, fruit-infused water or sparkling lemonade adds a delightful fizz that pairs perfectly with the creamy texture of the pops.
Storage and Shelf Life
To maintain the quality and freshness of your homemade pops, proper storage is essential.
Best Practices for Storing the Pops to Maintain Freshness
Store the pops in an airtight container in the freezer, separated by parchment paper to prevent them from sticking together. This ensures that they remain easy to access and won’t lose their shape or flavor.
Discuss How Long They Can Be Kept in the Freezer and Signs of Freezer Burn
Homemade frozen yogurt raspberry swirl pops can last up to 2-3 months in the freezer. However, it’s best to consume them within the first month for optimal taste. Watch out for signs of freezer burn, such as discoloration or an icy coating, which can occur if the pops are not properly sealed.
Conclusion
Making your own frozen yogurt raspberry swirl pops is a delightful way to indulge in a sweet treat while enjoying the health benefits of whole, nutritious ingredients. The ability to customize flavors and mix-ins allows for endless creativity, making these pops a fun activity for the whole family.
Embrace the joys of homemade frozen treats this summer, and savor the satisfaction of creating something delicious that everyone can enjoy. With their vibrant colors, refreshing taste, and health-conscious ingredients, these pops are sure to become a staple in your summer menu. So grab your ingredients, get creative, and enjoy the process of making these delightful frozen yogurt raspberry swirl pops!


